Xiegu XPA125B · Volume 3
Xiegu XPA125B — Vol 3: Programming
100W HF/6m amp with built-in antenna tuner
3.1 Programming workflow
The XPA125B has no codeplug in the traditional sense — no software, no USB-loaded channel database, no “CPS” tool. Configuration is split between front-panel menus (the runtime configuration that you’ll change between operating sessions) and DIP switches on the internal main board (the install-time configuration that you set once and forget).
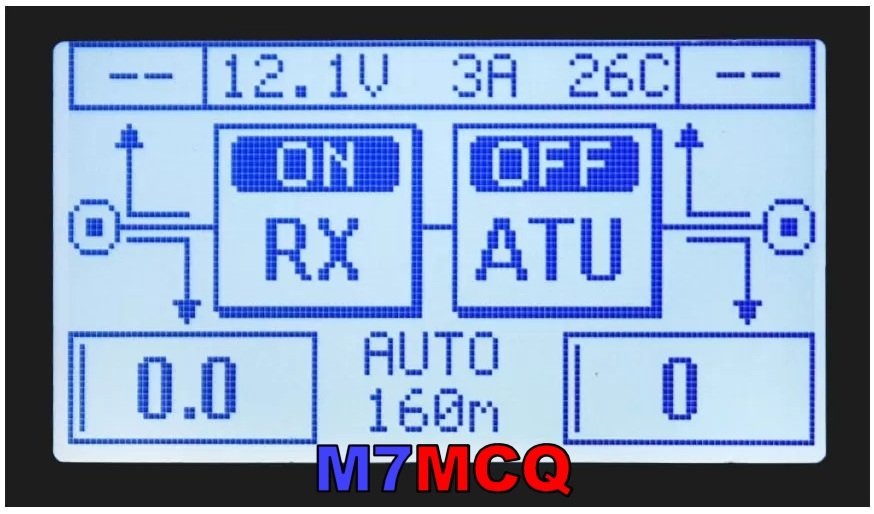
3.1.1 Front-panel menu items
Enter the menu via the FUNCTION button. The exact menu structure varies by firmware version; the canonical items are:
- ALC threshold: 0-100% (or equivalent voltage scale). Sets how aggressively the ALC output line clamps drive power. Start at ~80% and adjust empirically — too low and the amp can’t hit full output; too high and you risk over-driving and splatter.
- Fan mode: auto / always-on / always-off. Auto is the default and the right answer for nearly every use case. Always-on is useful for hot-shack contesting where you want maximum cooling from the start. Always-off is a footgun — don’t.
- Band detect mode: auto-sense / CAT-driven / manual. Auto-sense reads the input frequency and picks the band filter. CAT-driven reads the X6100’s CAT data. Manual locks to the band you select on the front panel. For an X6100-paired station with CAT connected, use CAT-driven; for a portable setup with no CAT, use auto-sense.
- RF-sense sensitivity: 0-100%. How much input RF triggers the TX changeover. Too low and the amp keys on stray pickup; too high and it misses real drive. Default ~50% is typical.
- VOX hold time: 50-500 ms. How long the amp stays in TX after RF drops. Tune for the mode — short for digital, longer for CW.
- Display brightness: 0-100%.
- Standby/operate: same as the front-panel switch but exposed in the menu for completeness.
- Reset to factory defaults: a one-button factory reset. Useful when you’ve fiddled too much and want to start over.
3.1.2 Internal DIP switches
A small DIP block on the main PCB (visible after removing the top cover) controls install-time options:
- Default ALC polarity (positive-going vs negative-going voltage to the rig). Different rigs expect different polarities — the X6100 expects negative ALC (the most common convention). TBD: verify the DIP-switch position for X6100-compatible ALC.
- Band-data input format (open-collector vs 0-8 V analog vs serial CAT). Older Xiegu rigs used an analog band-voltage convention; newer ones use serial CAT.
- Fan thermostat threshold: low/medium/high. Default medium.
- Tuner enable/bypass at power-on: choose whether the tuner starts in bypass mode or active mode after a power cycle.
Once these are set for your station, leave them alone — they’re not session-level adjustments.
3.1.3 Firmware updates
There is no Xiegu updater program for the XPA125B. Firmware (a .xgf file) is sent from an ordinary terminal program — Tera Term — by XMODEM-1k over the amplifier’s data cable to a bootloader built into the amplifier. The procedure, from Radioddity’s instructions and Xiegu’s tutorial:
- Power the XPA125B from a 13.8 V supply, then switch it off. Connect the data cable and confirm the virtual COM port exists (Device Manager).
- Start Tera Term and open a serial connection on that COM port.
- Hold PA + BAND and, while holding them, press POWER; the bootloader screen appears (it shows the bootloader’s own version, not the firmware’s). Release the keys.
- Press PA (UPDATE). The existing firmware is erased at once, and after about 3 seconds Tera Term shows
Waiting Connect.C. - In Tera Term: File → Transfer → XMODEM → Send, select the
.xgffile and tick the “1k” option — without it the update fails and must be restarted from step 3. - When the transfer completes the amplifier power-cycles itself. Unplug the data cable and switch the amplifier off and on.
Every firmware load clears the tuner’s stored matches, so each antenna must be re-tuned afterwards. From V2.0.1 the amplifier shows its firmware version briefly at power-on; earlier firmware shows none. Owners report that Tera Term 4.96 works where newer versions stall at the end of the transfer; a failed transfer leaves the bootloader intact, and the upload can simply be repeated.
Firmware updates are rare. Only three releases are known: V2.0.0 build 013, V2.0.0 build 014 and V2.0.1 (2025-01-14). Firmware is not limited to the display and menus: V2.0.1 fixed the low-pass-filter group jumping during transmit on some bands, and the tuner’s stored data lives under firmware control too. All three releases and Tera Term 4.96 are archived at https://radios.fubsypoly.com/downloads/#xiegu-xpa125b. V2.0.1 is for the XPA125B only — never the older XPA125.
For the broader programming-software view of the Xiegu ecosystem (X6100 + XPA125B + G90), see Vol 3 (Programming software).
3.2 Codeplug backups
Not applicable. The XPA125B holds no per-channel data, no per-frequency memories, no contact lists. The only state worth documenting is the DIP switch configuration, the menu-set ALC threshold and fan/VOX preferences, and the physical cabling setup between the amp and the X6100.
Document these in a notes file kept with the amplifier. Items to capture:
- DIP switch settings (each DIP position, on/off, with the function it controls)
- Front-panel menu settings (ALC threshold value, fan mode, band-detect mode, RF-sense sensitivity, VOX hold)
- ALC cable wiring: pin-out from XPA125B ALC OUT to X6100 ALC IN — the specific 3.5 mm TRS or DIN pinout, including which conductor carries the signal voltage and which is ground
- CAT cable wiring: pin-out from XPA125B CAT to X6100 CAT — likely a 3.5 mm TRS or stereo cable
- PTT cable wiring: pin-out from XPA125B PTT IN to X6100 PTT OUT
- Power-supply cabling: which Powerpole or binding-post conductor is positive, which is negative, and the fuse rating (typically 25 A inline)
- Heatsink temperature observed at idle, after a 10-minute SSB rag-chew, and after a 30-second key-down at 100 W (baseline for spotting future cooling degradation)
These aren’t a codeplug, but they are the operational state that a “rebuild the station from scratch” recovery would need.
Comments (0)